Table of Contents
- Introduction
- Approved Document Types for Submission
- Approved Case Types
- How to Submit Documents (Sender)
- How to Review Submitted Documents (Clerk)
- After the Document Has Been Reviewed
Introduction
The Electronic Document Delivery System (EDDS) was developed to ensure continued access to the NYS
Court System for certain proceedings during times when court users are prevented from physically entering the courthouse. This new
system provides for the secure, centralized, and efficient delivery of documents to the court while eliminating the need for physical
contact at a courthouse. The type of documents which may be accepted by the court are authorized by the Chief Administrative Judge's
Administrative Orders and those issued by each Judicial District's Administrative Judge.
The System will serve the courts as
a virtual "post office", for the one-way delivery of documents to the court by agencies and attorneys and self-represented
litigants. It is important to note that the EDDS is not a substitute for eFiling, nor is it considered to be a filing system. Rather,
it is designed to provide a secure alternative to email or in-person delivery of approved documents.
Benefits of Electronic Document Delivery System
- Provides a secure method to electronically transmit documents
- Enforces strict controls over document visibility
- Includes comprehensive built-in virus checking
- Tracks the sending/receiving of documents for audit purposes
- Retains all documents in statewide content management system
Approved Document Types for Submission
Persons or agencies wishing to utilize the EDDS to transmit documents to a court should be advised to contact the court or appropriate Judicial District Office to confirm that the court is authorized to accept and process specific document(s).
Back to Table of ContentsApproved Case Types
Authorized Case Types, and at what stage of the proceeding they can be scheduled, may vary from week to week, and from one judicial district to the next. Before using the EDDS, persons or agencies wishing to transmit documents associated with particular case types should contact the court or appropriate Judicial District Office to confirm that the court is authorized to accept document(s) associated with specific case types.
Back to Table of ContentsHow to Submit Documents (Sender)
Each court will identify their targeted submitters (for example, agencies, attorneys, and/or litigants) and provide them with the following instructions on how to submit documents.
Step 1:
The court should direct the submitter to the
Electronic
Document Delivery System submission webpage. The submitter will click on the appropriate court type to enter the site.
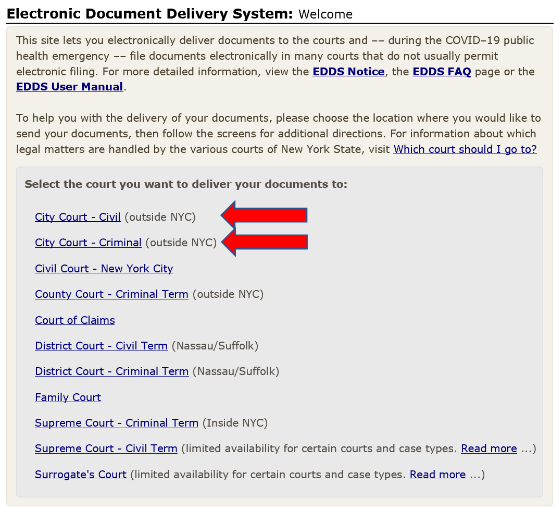
Then the submitter will click on Next to begin their submission.

Step 2:
The submitter will enter the following information about who they are and why they are submitting a document. All the documents entered
should be submitted for a single case. Any field with an asterisk * is a required field.
Note: "Unknown" or "Not
Applicable" can be entered in the Case Number and Case Title fields.

The sender has the ability to request that the document(s) be "Filed" by the clerk upon the court's review.
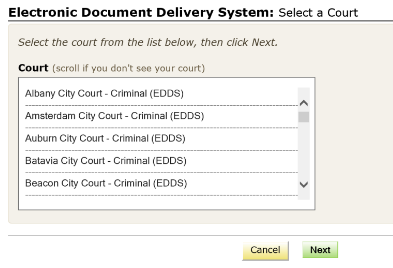
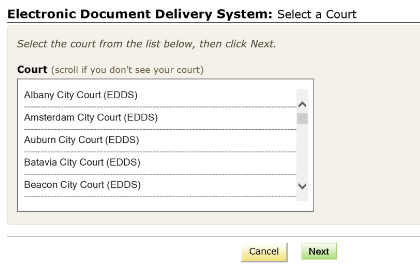
Step 3: Select a Court
The submitter will indicate the specific court to which they are submitting their document.
For Criminal Matters:
For Civil Matters:
Step 4:
The submitter will indicate the case type to which the document applies. The selection will determine in which "cabinet" the document will be available on the court's reviewer's side.
- For criminal case types, choose "Criminal"
- For civil case types, choose "General Civil"
- For landlord tenant case types, choose "Landlord and Tenant"
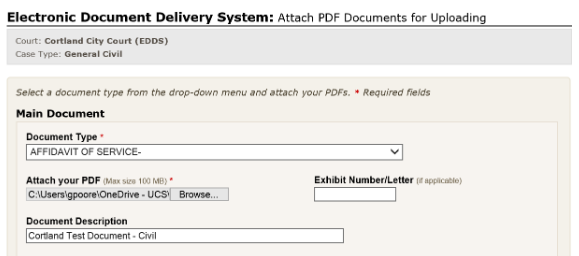
Step 5
The sender will indicate the type of document that is being submitted. More than one document may be submitted per case. The document must be in PDF format. Note: All the documents entered should be submitted for a single case.
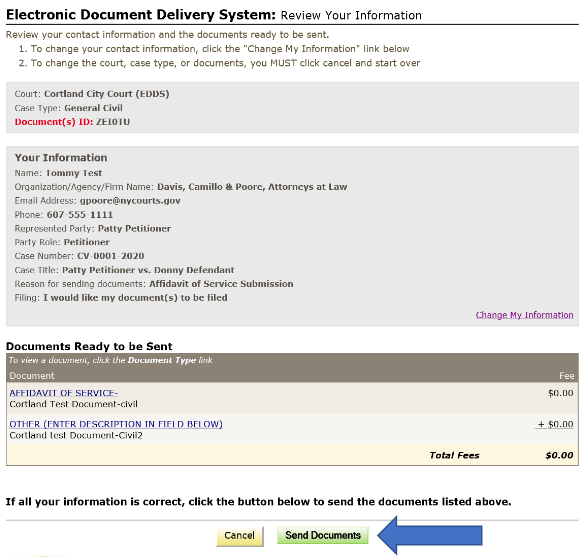
Step 6:
After the document(s) have been uploaded, the submitter will be taken to a review screen. The submitter will click on the green
Send Documents button to finish the submission.
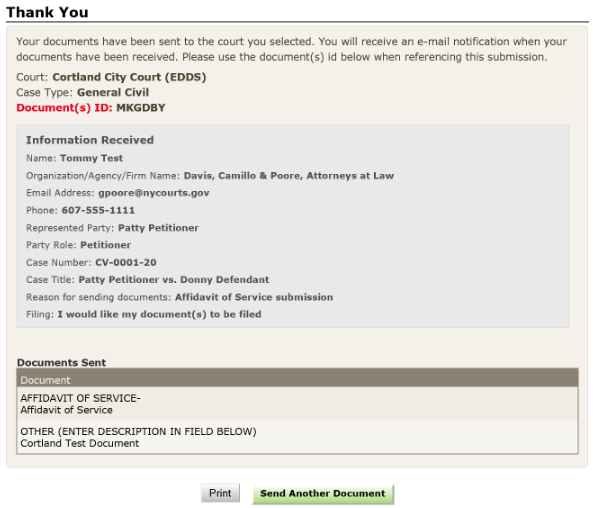
Once the user selects "Send Documents", they will see a "Thank You" verification screen.
Step 7:
Once the document(s) are submitted, the submitter will receive a confirmation email that the documents have been received. The
submitter will proceed with the case as directed by the court.
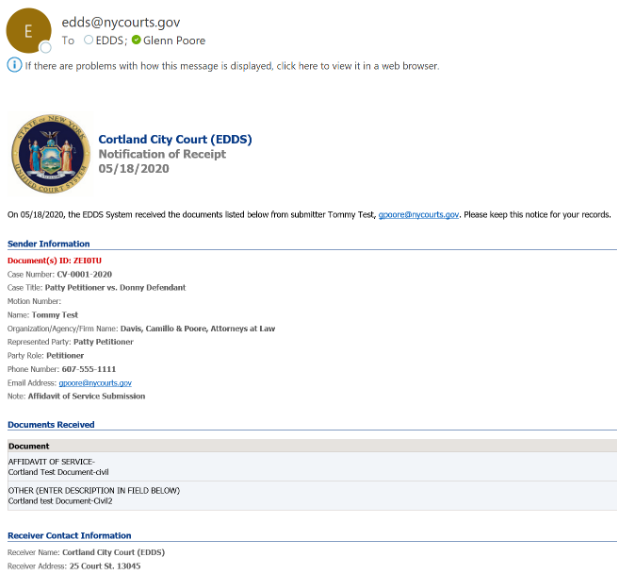
The court will also receive an email indicating that a sender submitted a document to their EDDS account.
How to Review Submitted Documents (Clerk)
Court Clerks/Staff will be able to retrieve and review the documents submitted to their court via a "To-Do list" via the NYSCEF System.
Step 1:
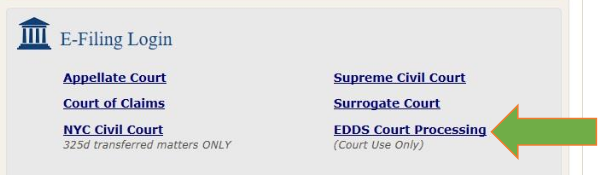
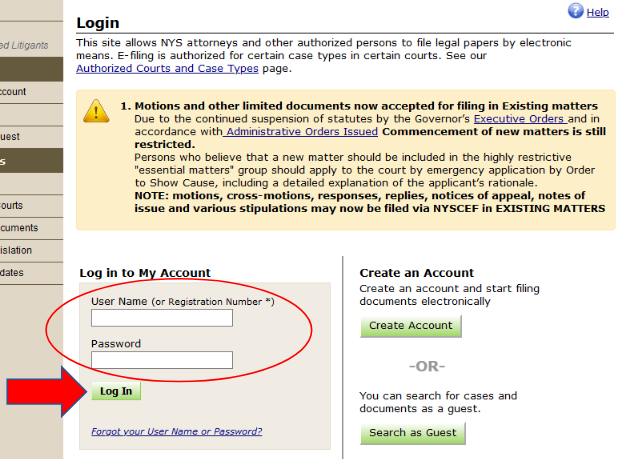
The court reviewer will go to the
NYSCEF website and
click on EDDS Court Processing (Courts Use Only).
The user will be brought to the
NYSCEF Login page.
Log in with the account credentials provided by DoTCR.
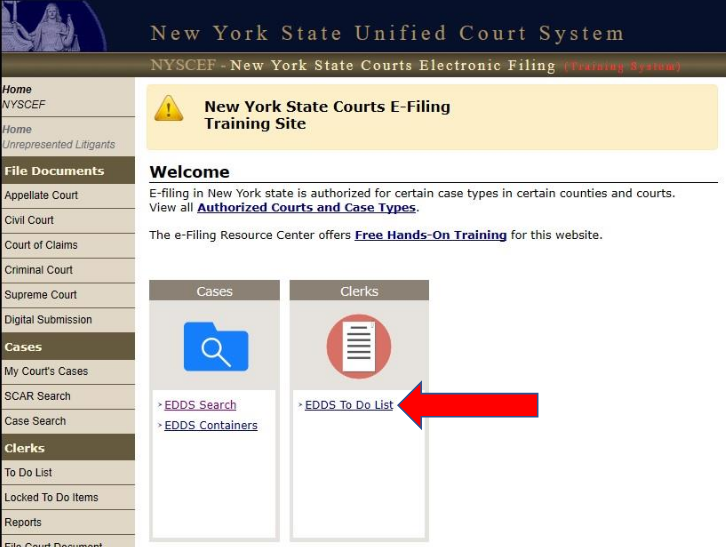
Step 2:
The clerk will click on the EDDS To-Do List option under the Clerks menu.
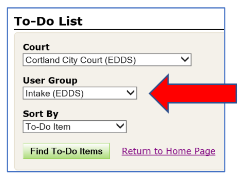
Step 3:
The clerk will be taken to the To-Do List selection page. Each Court will be set up with an "Intake" user group. Currently,
City & District Courts have only been assigned Intake (EDDS). The clerk will click on the green Find To-Do Items button to display a
list of all the documents submitted to the court.
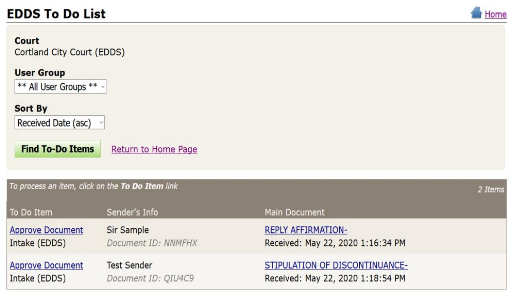
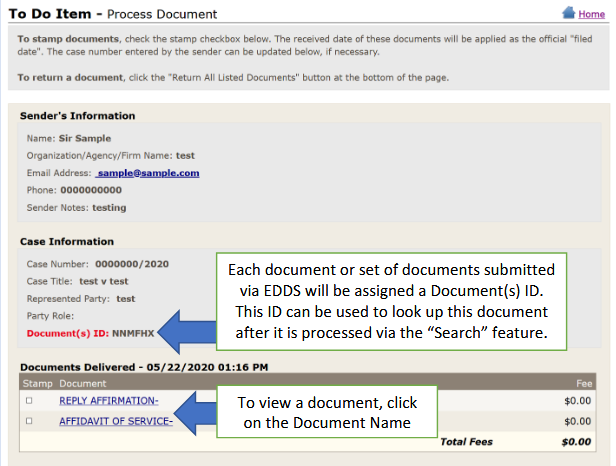
Step 4:
A list of documents submitted via EDDS will be displayed in a table below the selection options. All documents submitted within a case
type are viewable in a virtual "container". To view a document, click on the document name in the Document Type column. A PDF
will be displayed to the clerk in a new window. This PDF can be saved to a folder on the computer so the clerk can later attach it to
the corresponding case/docket in UCMS.
To process a pending document, the clerk will click on "Approve Document" in the
first column in the table. The clerk will be taken to a new page (see below).
When a user clicks on "Approve Document",
it will lock the document and bring them to the "To-Do Item – Process Document Screen".
Step 5:
On the "To-Do Item – Process Document" screen, the user has many options while reviewing the document submissions: Verify the
sender and case info. Stamp a document as "filed" with the date and time as they would if the document had been submitted by
mail or in-person. Adding an Internal Note is not being used at this time. Add Comments to Case can be added to be emailed to the sender.
After the documents are reviewed, you can either Return All Listed Documents or Process All Documents.
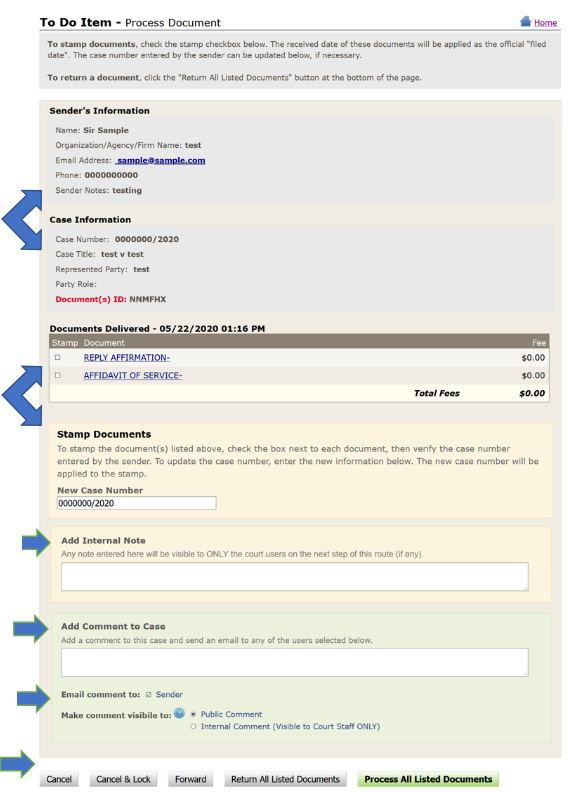
Review more detailed explanations of each part of the screen, below.
When the sender submitted their document(s), they had the ability to indicate that they wanted the documents to be "filed." The
checkbox to the LEFT of the Document Name allows the court staff to mark the pdf as "officially filed" with the date and time
that the document was received. This, however, is at the discretion of the clerk as determined by rule, statute, or administrative
order.
NOTE: EDDS is not a filing system. As Local Courts are not yet authorized for eFiling, court staff
should consult with their judges, managers and district offices regarding protocols for marking EDDS documents as "officially filed".
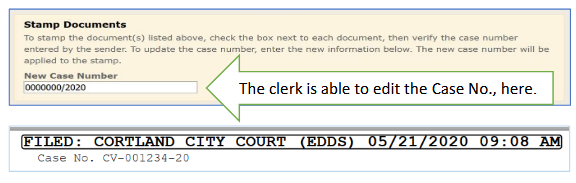
If the user chooses to mark the document as "filed", a FILED stamp will appear on the top of the document and display
the Court, the submission method of EDDS, Date, Time and Case No: The user has the ability to modify the Case Number that the sender
associated with the document(s). If a New Case Number is entered by the clerk, the new number will appear on the document.
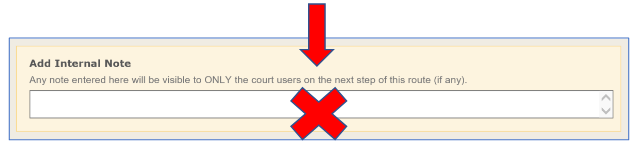
Note: At this time, the "Add Internal Note" field is not applicable for EDDS submissions and should be left blank.
Step 6:
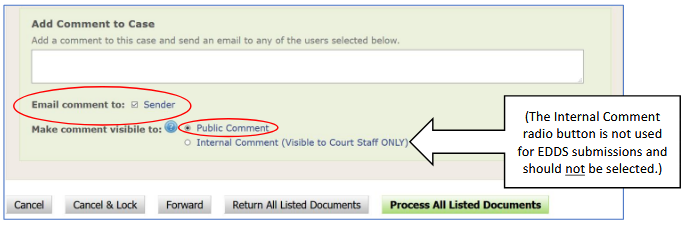
"Add Comment to Case" is an optional field used only to add comments to email sent to the document submitter when the document
is approved and processed. If a comment is entered, be sure to leave the Email Comment to Sender box checked and the Public Comment
radio button selected. Although the radio button indicates that the comment will be "public", only the sender will see the
comment on the return email; there is no public access to the EDDS.
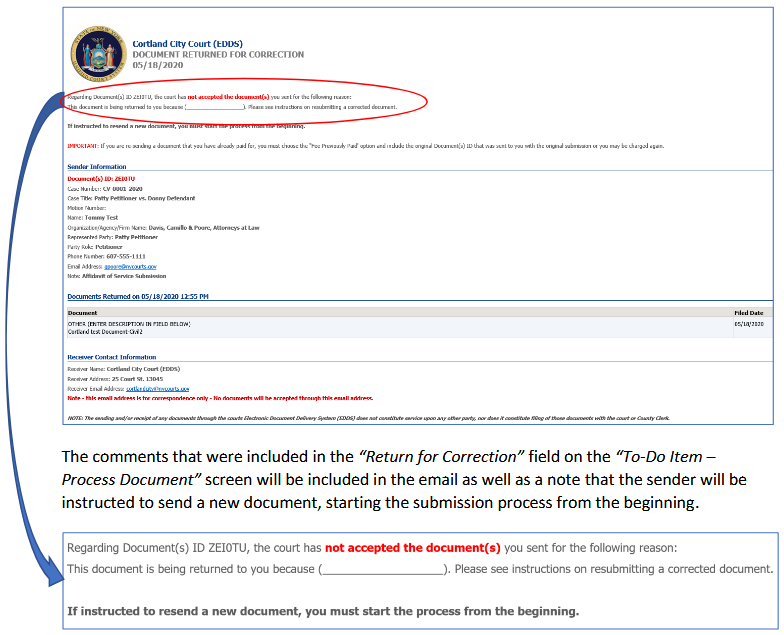
NOTE: Comments for documents that are
returned are not entered here. They are entered on the Return Document screen
From this section, the user has the ability to "Return All Listed Documents" or "Process All Listed Documents."
If the user selects Return All Listed Documents, they will be brought to the Return Document Screen where they can specify the reason
for the return in a text field. This comment will appear in the return email to the document submitter.
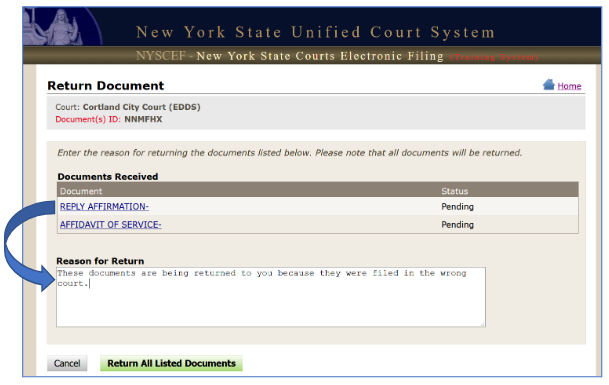
EDDS only permits the reviewer to return all of the listed documents, even if only one document needs to be returned.
Once the green Return All Listed Documents button is selected, the clerk will be brought to a Return Document Confirmation screen.
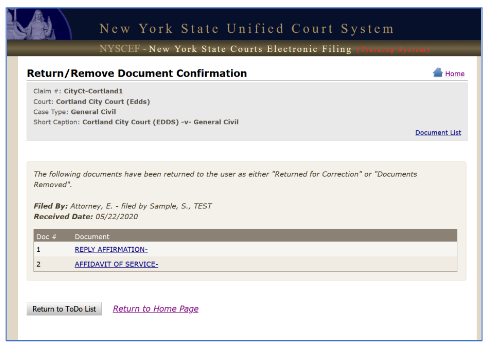
Once the Return/Remove Document has been processed, an email will be sent to the sender's email.
Step 7:

If all the document(s) are approved by the reviewing clerk, they will click on the green Process button, which completes the clerk's
review and sends them to a confirmation screen.
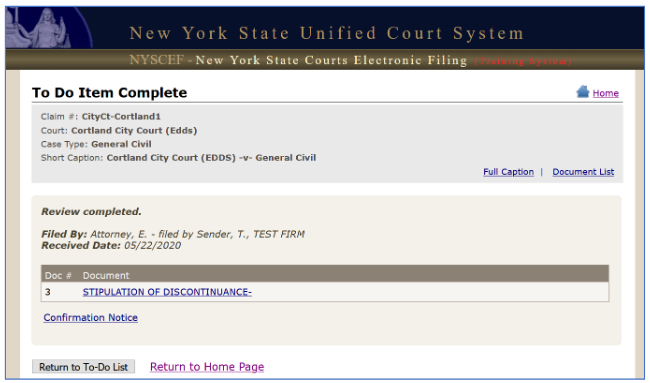
The clerk can click on the "Return to To-Do List" to continue review and processing or return to the Home Page.
Back to Table of Contents
After the Document Has Been Reviewed
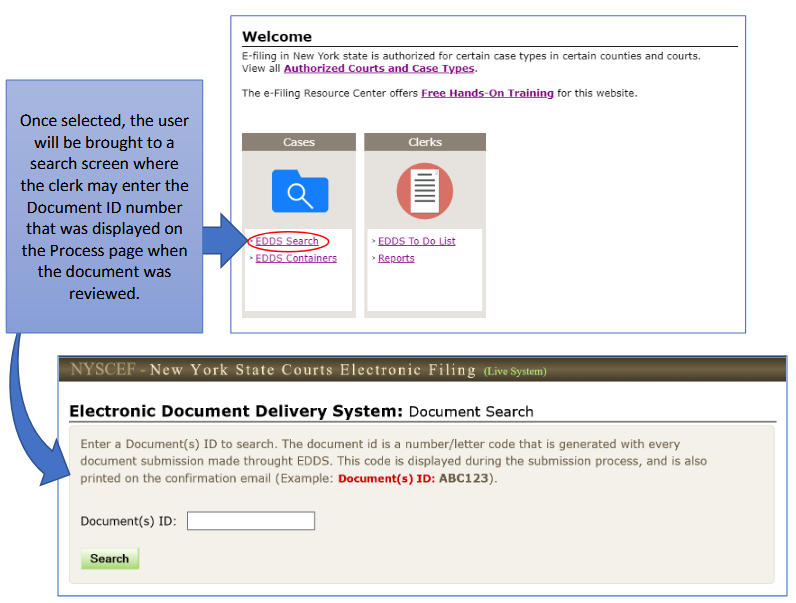
EDDS Search:
Retrieving a Processed Document:
If the court would like to retrieve the document from the EDDS after it has already been processed by the court, the clerk should
return to the NYSCEF home page, and click on EDDS Search under the Clerks menu.
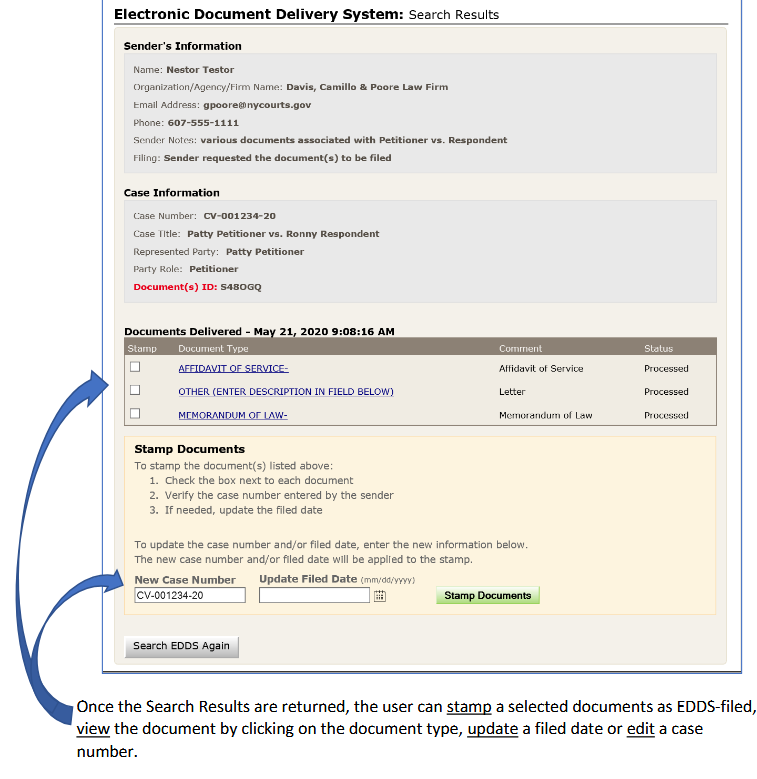
The EDDS Search Results screen will return all the documents that had been submitted under the specific Document ID.
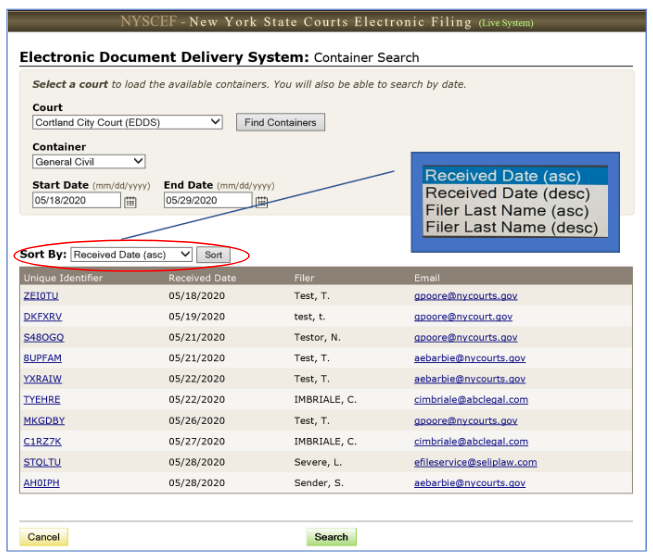
Container Search:

The Documents will be returned based upon the search parameters entered by the clerk.
The Container Search results can be sorted ascending or descending by Received Date or Filer (Submitter) Last Name.
Reports:
There are various reports which are available with the Court's EDDS. NOTE: Not all reports will be appropriate for
the current functionality for City & District Courts.
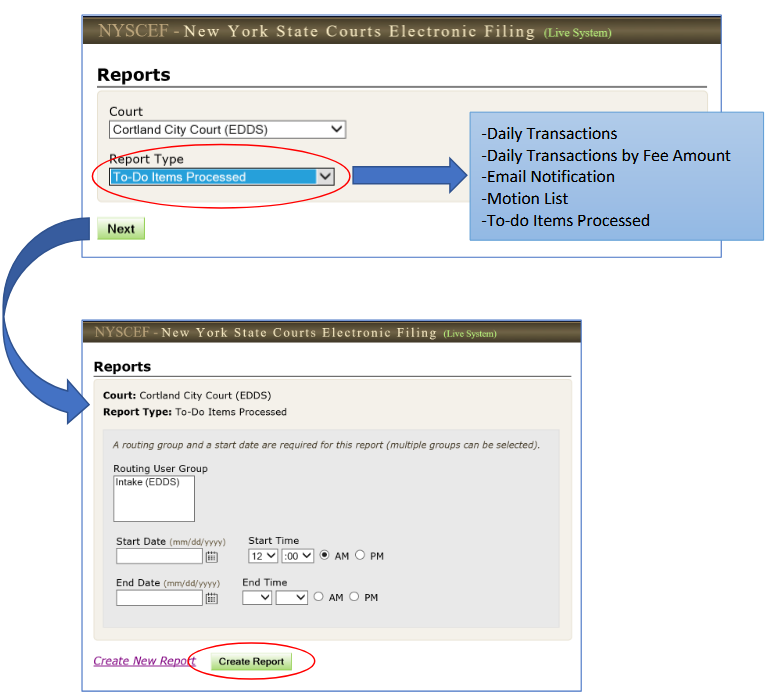
Once the clerk enters the report parameters, click on the green Create Report button. NOTE: Some reports may open in
a new window.
Sample Reports:
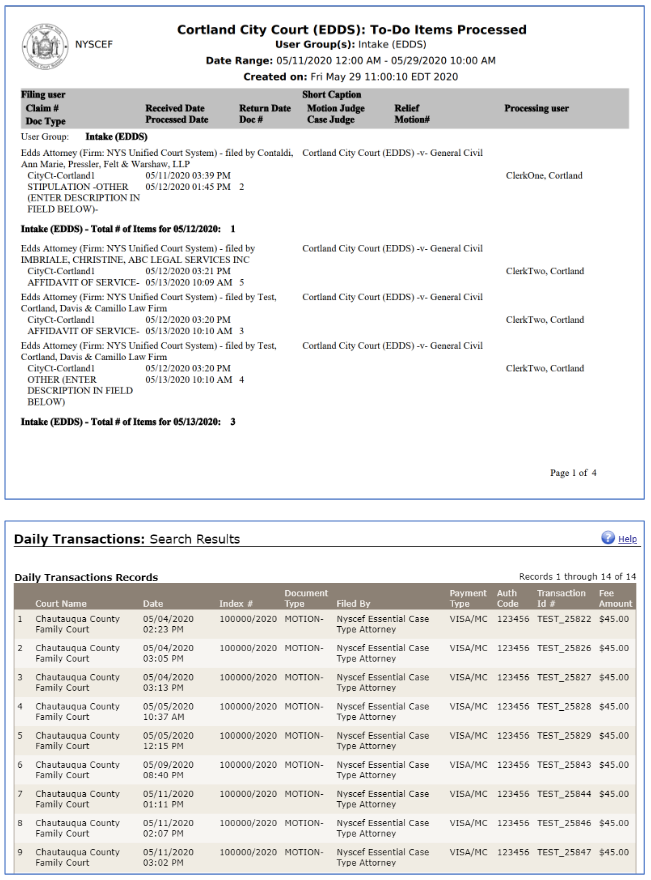
Back to Table of Contents